How to Set Up a Podcast Studio at Home – Complete Gear Checklist
Introduction: Why Podcasting at Home Is Growing in Australia
Podcasting is booming—and not just in the U.S. or Europe. In recent years, Australia has seen a major rise in podcast creators, with topics ranging from personal development and comedy to finance and local stories. The barrier to entry is lower than ever, thanks to affordable, high-quality gear and user-friendly software.
Whether you’re a content creator, educator, coach, or business owner, a home podcast studio gives you full control over your voice, content schedule, and creative process. Instead of booking expensive studio time, setting up a podcast studio at home allows you to record when inspiration strikes.
This article walks you through the complete gear checklist for podcast studio setup at home in Australia, with expert tips and equipment recommendations tailored for the Aussie market.
Don’t miss-out to read our engineers guide at the end!

Complete Podcast Studio Gear Checklist
Setting up a podcast studio doesn’t have to be expensive or complicated. You can scale your setup based on your needs and budget. Below is the gear you’ll need, whether you’re a solo podcaster or running an interview-style show.
1. Microphone – The Heart of Your Studio
The microphone is your most important investment. You’ll choose between two types:
Condenser Microphones
-
Sensitive and great for clear vocal tones
-
Ideal for sound-treated rooms
-
Examples: Rode NT1, Audio-Technica AT2020
Dynamic Microphones
-
Better at rejecting background noise
-
Perfect for untreated rooms
-
Examples: Shure SM7B, Rode PodMic
🎯 Australian Tip: If you’re recording in a bedroom or home office without sound treatment, dynamic mics are often a better choice.
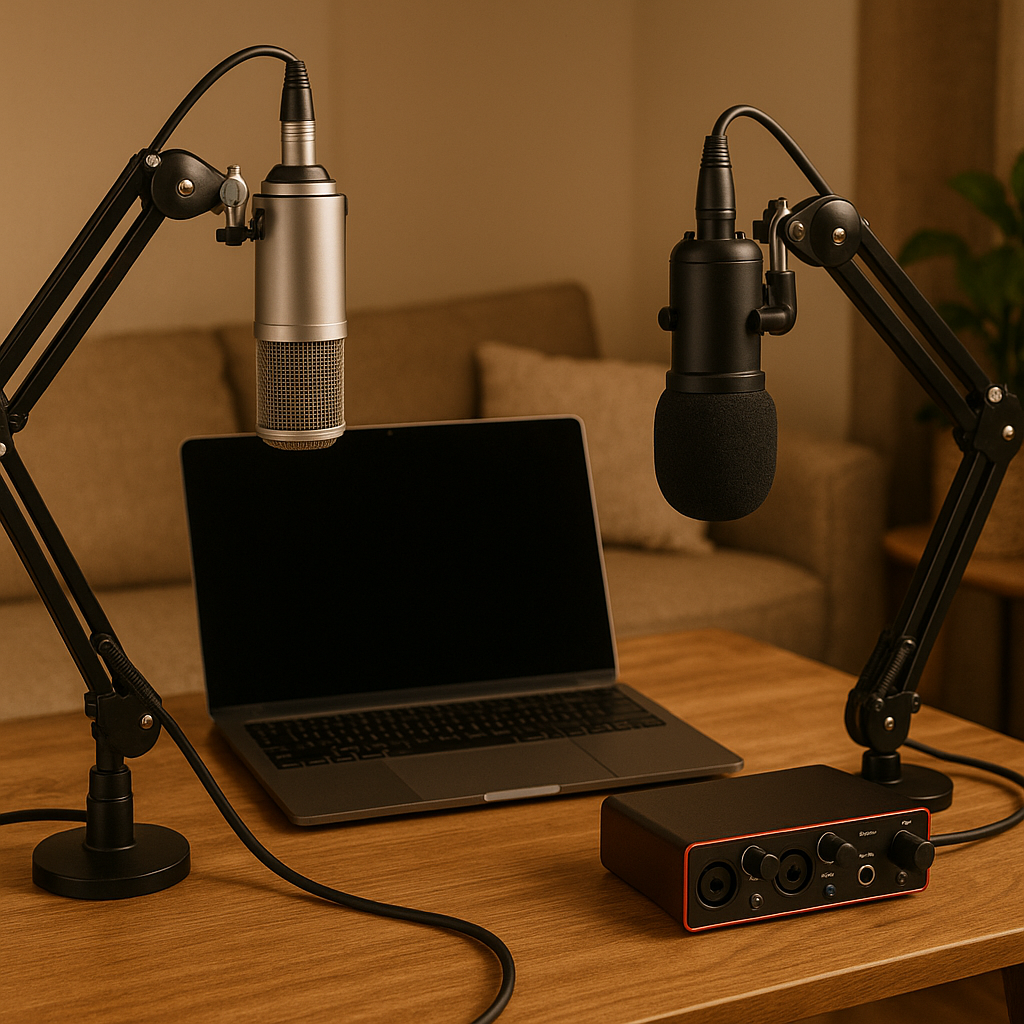
2. Audio Interface – Your Sound Translator
An audio interface converts analog microphone signals into digital data for your computer.
Top Interfaces in Australia:
-
Focusrite Scarlett 2i2 (4th Gen)
-
Audient EVO 4
-
Presonus AudioBox USB
Look for:
-
At least 2 XLR inputs
-
Phantom power for condenser mics
-
USB-C or USB 3.0 compatibility
💡 Quick Tip: If you’re using a USB microphone, you don’t need an interface—but it limits your long-term flexibility.
3. Closed-Back Headphones – For Precision Monitoring
Avoid audio bleed and get accurate playback with closed-back headphones. These allow you to hear every detail of your recording without external noise interference.
Recommended Models:
Choose headphones that offer comfort for long recording or editing sessions.
4. Boom Arm & Shock Mount – For Better Ergonomics
A boom arm helps position the mic comfortably and frees up desk space, while a shock mount reduces unwanted vibrations and knocks.
🔧 Pro Setup Tip (Australia): Many Australian homes have thick timber desks—get a boom arm with a wide grip clamp for a snug fit.
5. Pop Filter or Windscreen – For Clean Sound
Plosives (like “P” and “B” sounds) can ruin audio clarity. Use a pop filter or foam windscreen to block these harsh sounds.
-
Pop filter: Mesh screen mounted in front of mic
-
Windscreen: Foam cap placed over mic
🎙️ Bonus: Both help extend mic lifespan by reducing moisture contact from breath.
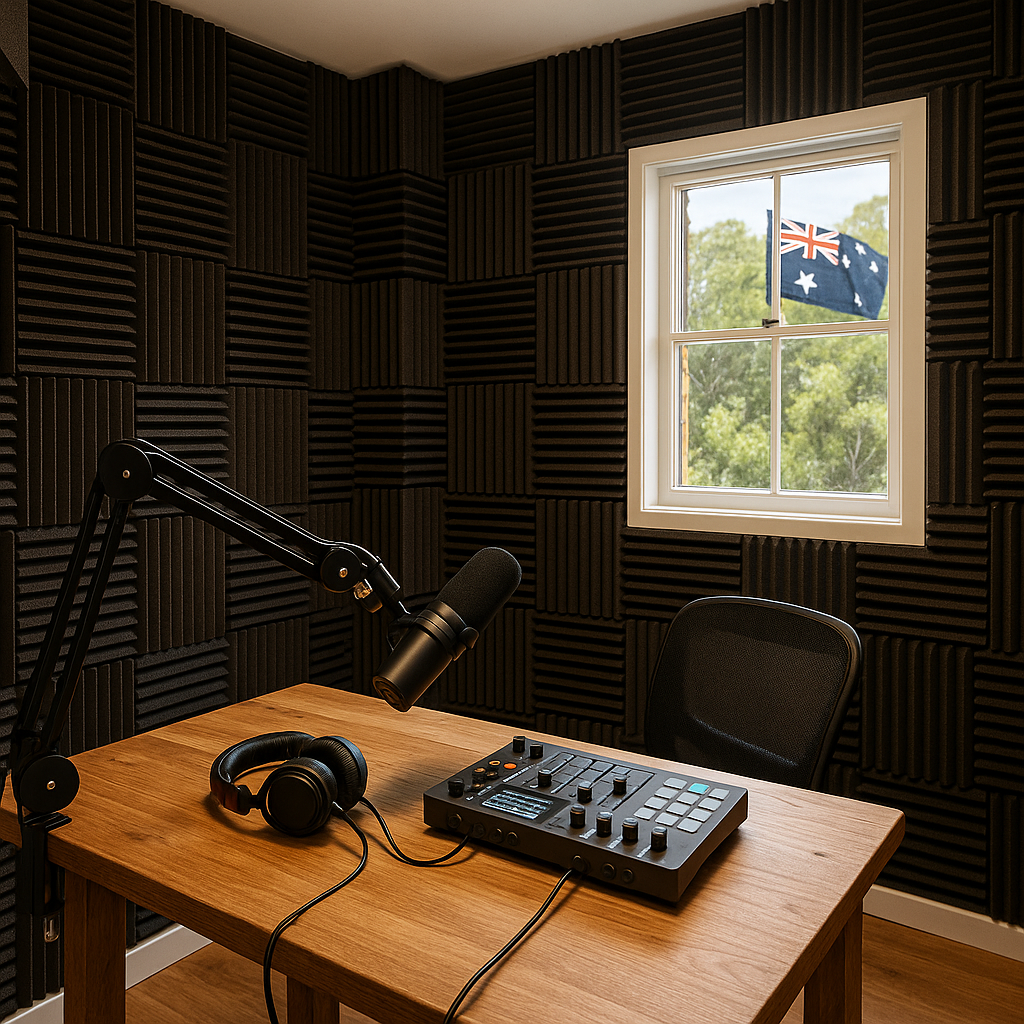
6. Acoustic Treatment – Create a Sound-Friendly Space
Good gear is half the equation; your environment matters just as much. Treat your space to avoid echo, reverb, or room noise.
Simple Acoustic Treatment Setup:
-
Foam panels behind your microphone
-
Bass traps in the corners
-
Heavy curtains or rugs to dampen reflections
7. Digital Audio Workstation (DAW) – For Recording & Editing
Your DAW is where the magic happens. It records, edits, and exports your audio.
Top DAWs for Podcasters in Australia:
-
Audacity (Free and open-source)
-
GarageBand (Great for Mac users)
-
Adobe Audition (Advanced)
-
Reaper (Affordable and powerful)
🎯 Pro Tip: Set your sample rate to 44.1kHz or 48kHz and record in WAV format for high-quality sound.
8. Backup Recorder (Optional but Recommended)
Power cuts or software crashes can happen. Having a portable recorder like the Zoom H4n Pro as a backup ensures your content is always safe.
🎙️ Many seasoned Aussie podcasters carry one, especially during remote recordings or interviews.
Where to Buy Podcast Gear in Australia?
Look no further than Audio Shop Australia. We stock top podcasting equipment—from microphones and interfaces to complete podcast bundles—catered for Australian podcasters at every level.
Free shipping on select items
Local customer support
Exclusive deals on podcast gear bundles
💡 Tips for Recording at Home in Australian Environments
-
Avoid tiled or empty rooms—they reflect sound heavily.
-
Record early morning to avoid traffic and neighborhood noise.
-
Turn off fridges, ACs, or any humming electronics.
-
Use a laptop stand to elevate and keep fans away from the mic.
Frequently Asked Questions (FAQs)
1. How much does it cost to set up a podcast studio at home in Australia?
You can start under $400 AUD with budget gear or spend $1,500+ AUD for a professional-level home studio.
2. Do I need an audio interface if I use a USB microphone?
No, USB microphones connect directly. But for professional quality and multi-mic setups, an interface is highly recommended.
3. What’s the best microphone for a beginner?
We recommend the Rode PodMic or Audio-Technica ATR2100x for beginner podcasters in Australia.
4. Can I use my smartphone to record a podcast?
Yes, with a good mic and recording app. But for professional sound, a full setup is best.
5. What’s the benefit of acoustic treatment?
It reduces echo, enhances sound clarity, and gives your podcast that clean, studio-quality feel—even from your home.
Our Sound Engineer’s Recommendation
When building a podcast studio at home, the gear you choose plays a major role in the quality of your content. To make your decision easier, our in-house sound engineer at Audio Shop Australia recommends the following top-performing podcast tools for both beginners and pros:
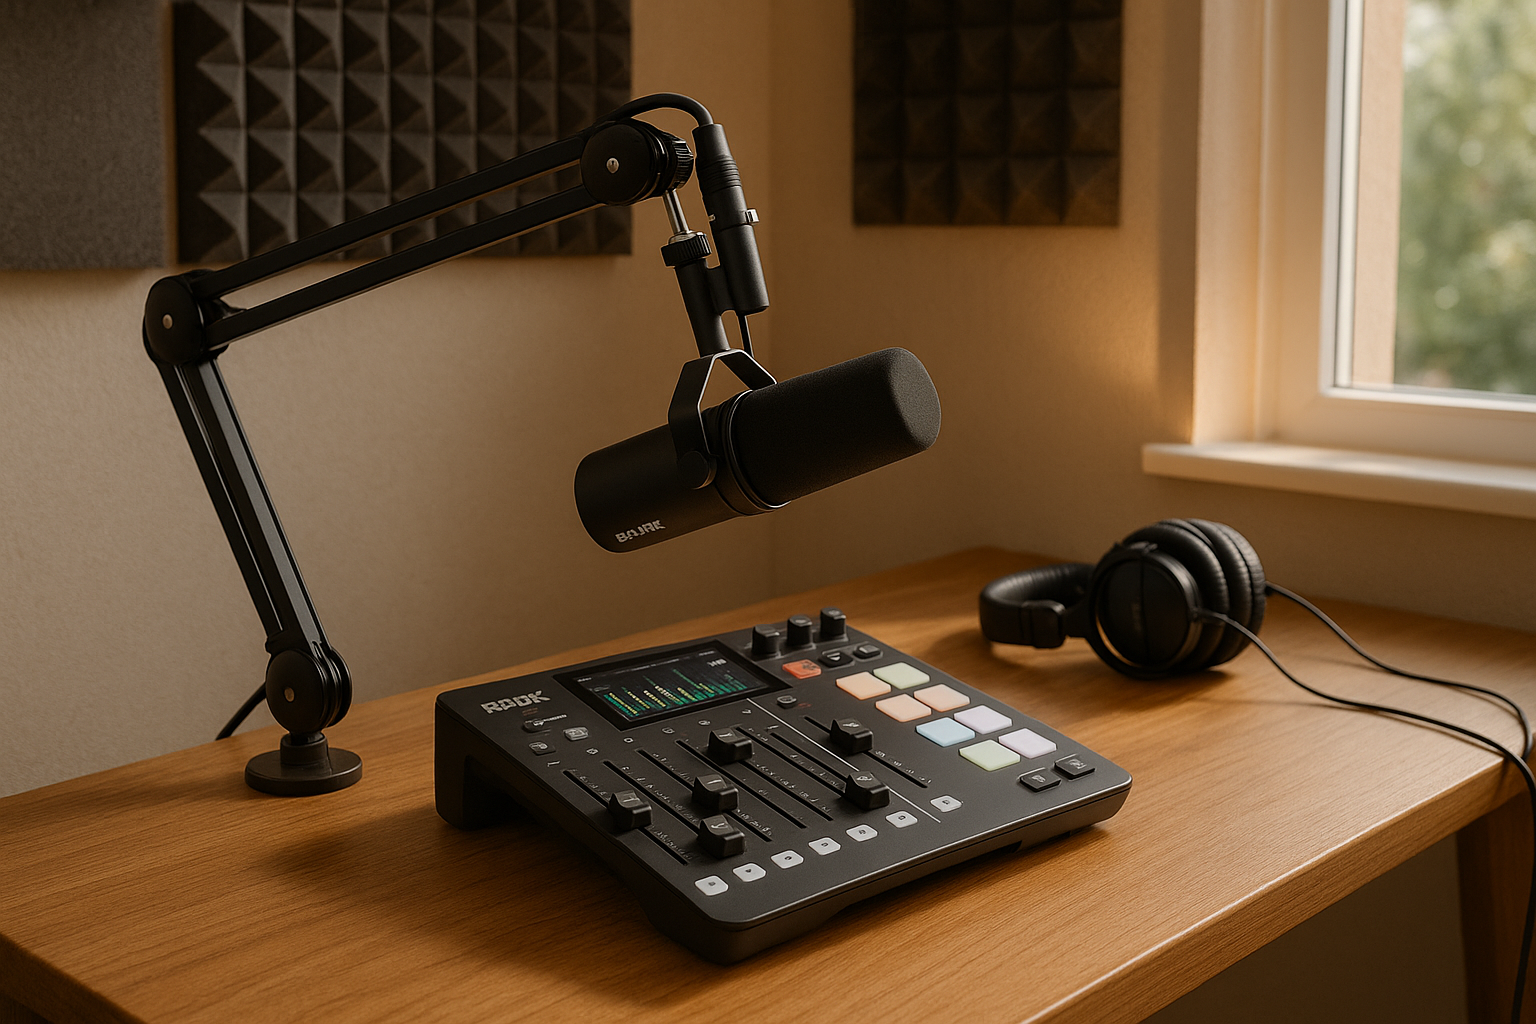
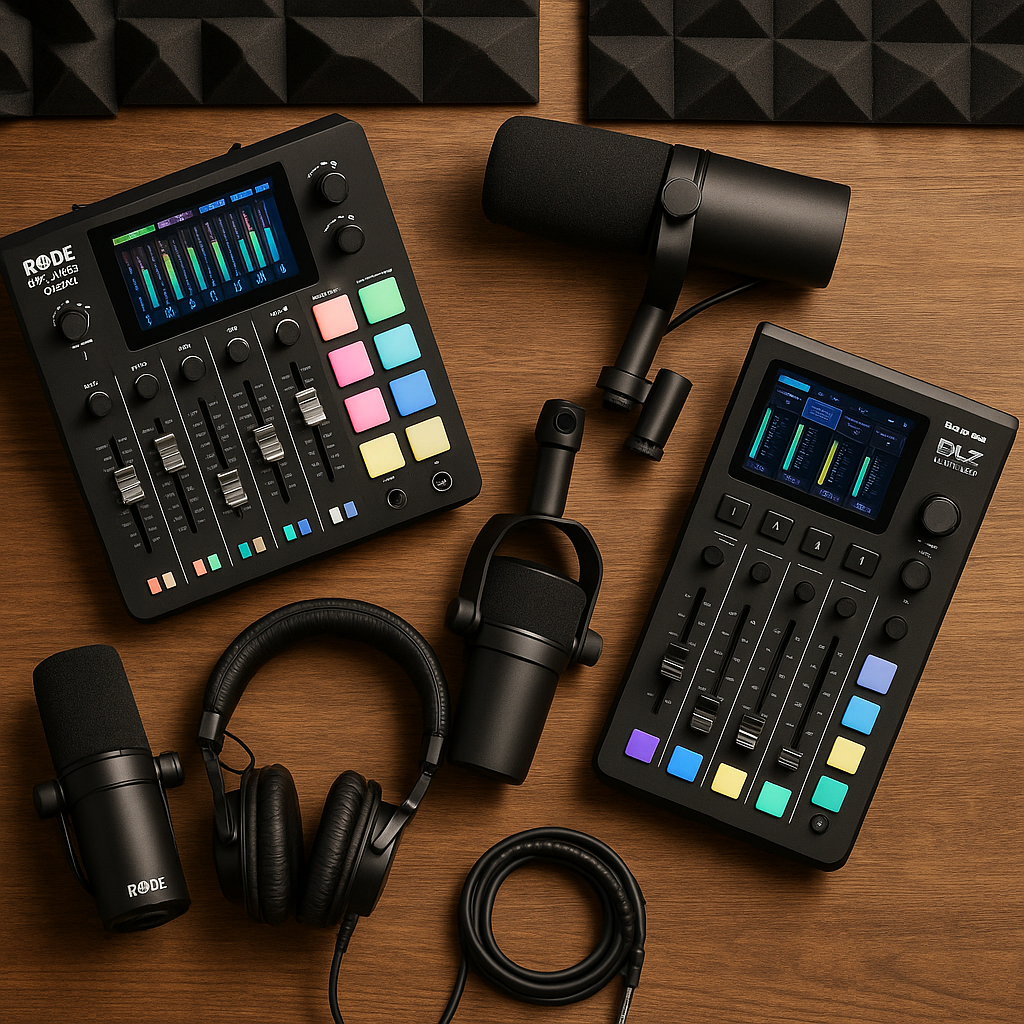
1. Rodecaster PRO II
Why we love it:
The Rodecaster PRO II is an all-in-one podcast production studio built with podcasters, streamers, and content creators in mind. It combines a mixer, audio interface, sound pads, effects engine, and multi-track recorder in a compact setup.
-
Built-in high-gain Revolution preamps
-
4 XLR mic inputs + Bluetooth & USB-C connectivity
-
Onboard recording to microSD or computer
-
Easy-to-use touchscreen interface
Perfect for: Professional podcasters who want an all-in-one solution with high flexibility and onboard effects.
2. Mackie DLZ Creator
Why we love it:
This AI-powered podcast mixer makes professional-level production incredibly easy, even for beginners. With automatic gain setup, voice shaping presets, and multitrack recording, it’s perfect for creators who want to focus on content.
-
4 mic inputs with XLR/TRS
-
AutoMix and Mix Agent™ for voice balancing
-
Studio-quality effects and EQ
-
Touchscreen interface with Creator and Pro modes
Perfect for: Content creators and beginners who want guided controls with pro-level audio results.
3. Shure SM7B
Why we love it:
An industry-standard dynamic microphone, the Shure SM7B delivers rich, warm, broadcast-quality audio with minimal background noise.
-
Cardioid pattern with excellent off-axis rejection
-
Flat frequency response ideal for voice
-
Requires a clean preamp with plenty of gain
Perfect for: Professional podcasters and voice-over artists looking for a timeless mic with consistent quality.
4. Shure MV7 (USB + XLR)
Why we love it:
Inspired by the SM7B, the Shure MV7 is a hybrid USB/XLR mic, giving creators flexibility to start small and grow.
-
USB for plug-and-play use
-
XLR for pro interfaces
-
Built-in touch panel for mic control
Perfect for: Beginners looking for easy setup now with the option to upgrade later.
5. Rode PodMic
Why we love it:
This budget-friendly dynamic mic punches well above its price tag. Tailored for podcasting, it offers crisp, full-bodied sound in a durable build.
Why Podmic is great?
-
Internal pop filter
-
Solid metal construction
-
Balanced sound without harsh highs
Perfect for: Entry-level podcasters and anyone starting a podcast on a budget without compromising on sound.
These five picks have been tested, reviewed, and used in real podcast setups by professionals. Whether you’re starting your podcasting journey or upgrading your existing gear, our engineer-approved list will help you make a confident decision.
Check out the official website for : RODE, Shure, Mackie and more.
🔚 Final Thoughts
Creating a podcast studio at home in Australia is no longer reserved for professionals. Whether you want to launch your first episode or level up your current setup, having the right gear and an optimized recording space will help you stand out.
At Audio Shop Australia, we’re here to help you every step of the way—from gear selection to setup tips. Start with what you can afford and grow as your audience does. Remember, your voice matters—all you need is the right setup to share it.